Bibcit Any2HTML — Complete WordPress Plugin Tutorial
The fastest way to turn Markdown, PDFs, and images into clean WordPress HTML — without ever leaving your post editor.
Table of Contents
- What This Plugin Does (in 60 seconds)
- Before You Start: Prerequisites
- Part A — Create Your BibCit Account & Generate the API Key
- Part B — Install the Plugin on WordPress
- Part C — Activate & Configure the Plugin
- Part D — Using the Plugin Inside the Post Editor
- Part E — Method 1: Insert Markdown (paste from anywhere)
- Part F — Method 2: Upload a PDF
- Part G — Method 3: Upload an Image (OCR)
- Part H — Combining Multiple Sources Into One Post
- Part I — What Formatting is Preserved
- Part J — Toggling the Converter On/Off
- Part K — Troubleshooting
- Part L — Tips, Best Practices & Pro Workflows
- Support
1. What This Plugin Does (in 60 seconds)
Bibcit Any2HTML adds a single panel (“meta box”) to your WordPress post and page editor that accepts three kinds of input:
- Markdown text — paste from ChatGPT, Claude, Gemini, Obsidian, Notion, GitHub READMEs, anywhere.
- A PDF file — upload it; the content (text, equations, tables, images) is extracted.
- An image file — JPG, PNG, WebP. The content is OCR’d, including handwriting, math symbols, and chemistry notation.
Click Convert to HTML and the plugin pushes perfectly formatted HTML straight into your post — no copy-pasting, no re-formatting, no broken tables.
It works with Gutenberg (Block Editor), the Classic Editor, and TinyMCE.
Why use it? Markdown is faster to type than clicking through Gutenberg blocks. AI tools output Markdown by default. PDFs and images carry content that’s traditionally painful to re-type. This plugin handles all three in one click.
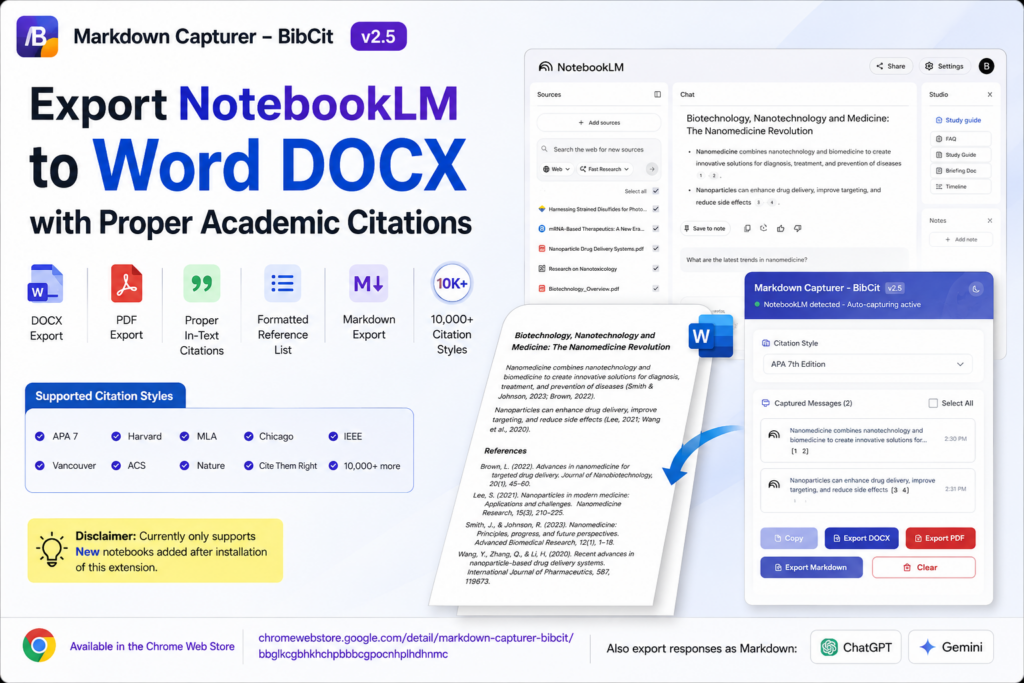
⚠️ Important for ChatGPT & Gemini users: Both platforms have permanently removed proper Markdown copy functionality — their default copy buttons now strip code blocks, tables, and links. To get real Markdown out of ChatGPT and Gemini (which Any2HTML needs to work properly), you must install the free BibCit Markdown Capturer browser extension: https://www.bibcit.com/en/mcapturer. Full details in Part E.
2. Before You Start: Prerequisites
Make sure you have:
| Requirement |
Notes |
| A self-hosted WordPress site |
WordPress.org, version 5.0 or newer. (WordPress.com Business/Commerce plans also support custom plugins.) |
| Administrator access |
You’ll need permission to install plugins. |
| A working email address |
Required for BibCit account verification. |
| An internet connection |
The plugin sends Markdown/PDF/image to api.bibcit.com for processing. |
| BibCit credits |
Every new account gets 5 free credits after email verification. After that: 1 credit per MB for Markdown, 1 credit per page for PDF/Image. |
| BibCit Markdown Capturer extension (for ChatGPT/Gemini users) |
Free browser extension required to capture true Markdown from ChatGPT and Gemini, since their built-in copy buttons no longer preserve formatting. Install: https://www.bibcit.com/en/mcapturer |
3. Part A — Create Your BibCit Account & Generate the API Key
The plugin will not function without a valid API key. Get this before installing the plugin so you can configure it in one sitting.
Step A1 — Visit BibCit
Open a browser tab and go to:
https://www.bibcit.com/en
Step A2 — Sign Up
- Click the Sign Up (or Register) button in the top-right corner.
- Enter your email address and create a strong password.
- Click Create Account.
Tip: Use a real email you actively check. The verification link goes there, and so do API key recovery messages.
Step A3 — Verify Your Email (from the Payments Tab)
Important: Email verification is now done inside your dashboard, not via a click-link in your inbox. Follow these exact steps:
- After signing up, you’ll be redirected (or you can navigate manually) to your dashboard:
https://www.bibcit.com/en/my-dashboard
- Inside the dashboard, click the Payments tab in the left sidebar / top menu.
- On the Payments page, look for a banner or button that says “Verify Email” (or similar — typically near the top of the Payments tab if your email is unverified).
- Click Verify Email. A verification email will be sent to the address you registered with.
- Open your inbox, find the BibCit email (subject usually contains “Verify your email”), and click the verification link inside.
- You’ll be redirected to a “Email verified” confirmation page.
- Return to your BibCit dashboard — your account is now verified, and 5 free credits will be added to your balance automatically.
If the email doesn’t arrive within 2 minutes, check your Spam/Promotions folder. Still missing? Click the verify button again to resend, or contact bibcithelp@gmail.com.
Step A4 — Stay Logged In to Your Dashboard
If you ever log out, return to https://www.bibcit.com/en/my-dashboard and sign back in. Your verified status and 5 free credits persist across sessions.
Step A5 — Generate Your API Key (from “My Profile”)
The API key is generated from your profile modal — not from a separate API page. Follow these steps precisely:
- Make sure you’re logged in to https://www.bibcit.com/en/my-dashboard.
- Look at the upper-right corner of the page — you’ll see your profile icon (a circular avatar or initials).
- Click the profile icon. A small dropdown menu will appear.
- In the dropdown, click “My Profile”.
- A modal window will open, titled “Profile Information”.
- Inside the modal, scroll down (if needed) until you see a section labelled “API Key:”.
- Click the button labelled “Generate API Key” (if you’ve never generated one before) or “Regenerate API Key” (if you already have one and want a new one).
- Your API key will appear in the field — a long alphanumeric string.
Step A6 — Copy & Safely Store the Key
⚠️ CRITICAL: The API key is shown only once. The moment you close the modal or refresh the page, the key is hidden permanently. If you lose it, you’ll have to regenerate a new one (which invalidates the old key).
- Click the copy icon next to the key (or select all →
Ctrl+C / Cmd+C).
- Paste it immediately into a password manager, secure note, or text file you control.
- Treat it like a password — anyone with your key can use your BibCit credits.
You now have everything needed to configure the plugin.
4. Part B — Install the Plugin on WordPress
There are two ways to install: directly from the WordPress dashboard (recommended) or by downloading the ZIP.
Method 1 — Install From WordPress Plugin Directory (Recommended)
Step B1 — Log in to WordPress Admin
- Go to
https://yourwebsite.com/wp-admin
- Enter your WordPress username and password.
- Click Log In.
Step B2 — Open the Plugin Marketplace
In the left sidebar, hover over Plugins and click Add New.
You should now see the WordPress plugin marketplace screen with a search bar in the top-right.
Step B3 — Search for the Plugin
- Click the search box labeled “Search plugins…”.
- Type: Bibcit Any2HTML
- Press Enter (or wait — results auto-load).
The plugin card will appear with the BibCit logo, the title “Bibcit Any2HTML”, a short description, ratings, and an Install Now button.
Step B4 — Install the Plugin
- On the plugin card, click Install Now.
- Wait 5–15 seconds while WordPress downloads and unpacks the plugin.
- The button text will change to Activate.
Step B5 — Activate the Plugin
Click Activate.
WordPress will reload and show you the Plugins page with a confirmation message: “Plugin activated.”
Method 2 — Manual Install (only if Method 1 fails)
- Visit https://wordpress.org/plugins/bibcit-any2html/ in a browser.
- Click Download to get the
.zip file.
- In WordPress: Plugins → Add New → Upload Plugin.
- Click Choose File, select the downloaded ZIP, click Install Now.
- After upload, click Activate Plugin.
5. Part C — Activate & Configure the Plugin
The plugin is now installed. Next, give it your API key so it can talk to BibCit’s servers.
Step C1 — Open the Plugin Settings
In the WordPress sidebar:
- Hover over Settings.
- Click Any2HTML (or Bibcit Any2HTML depending on the version).
You’ll land on the plugin’s settings page.
Step C2 — Paste Your API Key
- Locate the field labeled BibCit API Key.
- Paste the key you copied in Step A6.
- Double-check there are no leading/trailing spaces.
Step C3 — Save Changes
Click Save Changes (usually at the bottom of the page).
Step C4 — Confirm Validation
After saving, the plugin will ping BibCit’s servers and validate your key. You’ll see one of two messages:
- ✅ “API key validated successfully” — you’re ready to use the plugin.
- ❌ “Invalid API key” — re-check the key for typos, then re-save. If it still fails, regenerate a new key from your BibCit dashboard and try again.
Step C5 — (Optional) Toggle the Converter
On the same settings page there’s usually a switch labeled Enable Markdown Converter. Leave it ON. If you ever want to temporarily disable the meta box (without uninstalling), flip this to OFF.
6. Part D — Using the Plugin Inside the Post Editor
Now the magic happens. Let’s create a new post and use the converter.
Step D1 — Create a New Post (or Page)
In the WordPress sidebar:
- Click Posts → Add New (or Pages → Add New).
Step D2 — Locate the Bibcit Any2HTML Meta Box
Look at your editing screen:
- In Gutenberg (Block Editor): the Any2HTML panel appears either:
- Below the main content area, or
- In the right-hand sidebar under the Document tab. (If hidden, click the three-dots menu in the top right → Preferences → Panels and enable it.)
- In the Classic Editor: the panel appears below the WYSIWYG editor, alongside other meta boxes like Categories and Tags.
The meta box title reads “Bibcit Any2HTML — Markdown / PDF / Image to HTML Converter” (or similar).
Step D3 — Understand the Three Tabs/Sections
The meta box typically shows three options:
| Tab |
What It Does |
| 📝 Markdown |
Paste Markdown text from any source. |
| 📄 PDF |
Upload a PDF; content is extracted server-side. |
| 🖼️ Image |
Upload JPG/PNG/WebP; OCR extracts text + math. |
Pick the right tab for what you have.
7. Part E — Method 1: Insert Markdown (paste from anywhere)
This is the most common workflow.
🚨 Pro Tip — You MUST Use the BibCit Markdown Capturer for ChatGPT & Gemini
ChatGPT and Gemini have permanently removed their built-in Markdown copy functionality. This is a critical change every user needs to know about:
- The default copy button on ChatGPT and Gemini now destroys all formatting.
- Code blocks become plain text (no language hints, no monospace).
- Tables lose their entire structure (rows and columns collapse into prose).
- Links break (anchor text and URLs separate).
- Math, headings, lists, and bold/italic are stripped or mangled.
Without proper Markdown, MassiveMark and Any2HTML cannot work their magic — garbage in, garbage out. The plugin needs real Markdown to produce clean HTML.
✅ The fix: Install the free BibCit Markdown Capturer browser extension:
https://www.bibcit.com/en/mcapturer
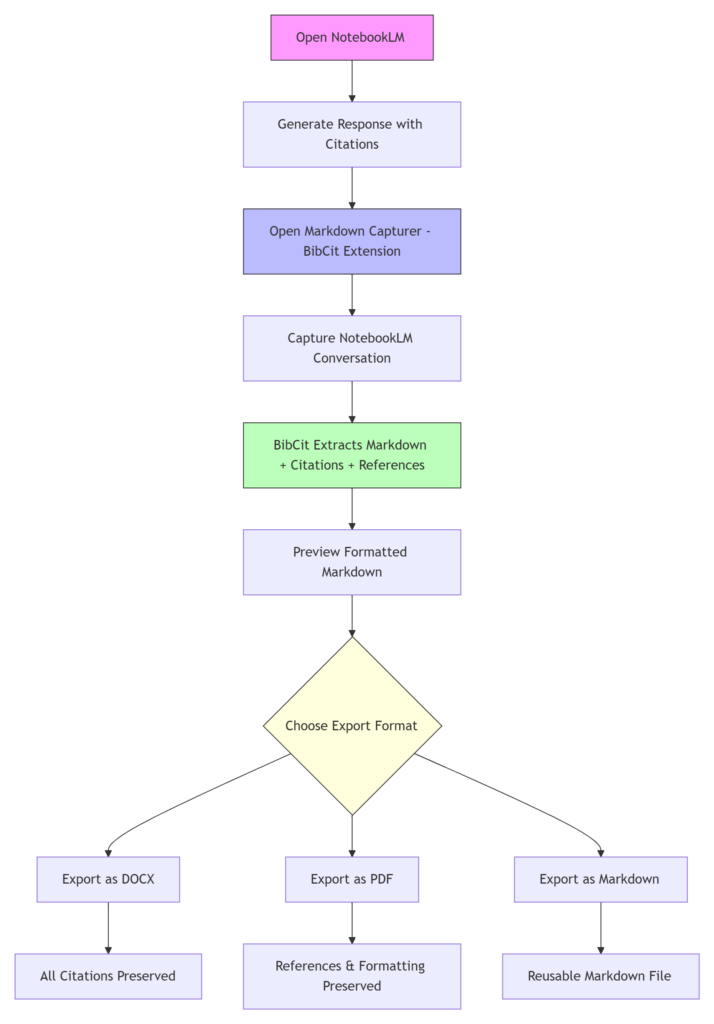
Once installed, the extension adds a “Bibcit Copy” button next to every ChatGPT and Gemini response. Clicking it captures the true Markdown — code blocks, tables, links, math, and all formatting fully intact — ready to paste straight into the Any2HTML meta box.
This extension is currently the only reliable way to get proper Markdown out of ChatGPT and Gemini. If you skip this step, your conversions will lose 90% of the formatting you expect.
Claude users: Claude still allows clean Markdown copy via its native copy button, so the extension is optional for Claude — but it streamlines bulk capture across multiple responses.
Step E1 — Get Markdown From Your Source
Examples:
- From ChatGPT / Gemini: Use the BibCit Markdown Capturer extension (see Pro Tip above) — click the “Bibcit Copy” button next to the AI response. Do not use the default ChatGPT/Gemini copy button — it strips formatting.
- From Claude: Click the copy icon at the bottom of Claude’s response (Claude preserves Markdown natively). Optional: use the BibCit Markdown Capturer for faster bulk copying.
- From Obsidian / Notion / iA Writer: Open the note, select all (
Ctrl+A / Cmd+A), then copy (Ctrl+C / Cmd+C).
- From a
.md file: Open in any text editor, select all, copy.
- From a GitHub README: Click the Raw button on the file, then copy the raw text (not the rendered HTML).
Step E2 — Open the Markdown Tab
In the Any2HTML meta box, click the Markdown tab if it isn’t already selected.
Step E3 — Paste the Markdown
Click inside the large text area labeled “Paste your Markdown here…” and paste your content (Ctrl+V / Cmd+V).
You’ll see your raw Markdown — symbols and all — appear unrendered. That’s expected.
Step E4 — (Optional) Edit Before Converting
Want to tweak something? Edit directly inside the textarea. You can:
- Fix typos.
- Add
## Headings or **bold** markers.
- Combine multiple paragraphs.
- Delete sections you don’t want.
Step E5 — Click “Convert to HTML”
Press the Convert to HTML button below the textarea.
The plugin sends your Markdown to api.bibcit.com, processes it server-side, and returns clean HTML.
While processing, you’ll see a spinner or “Converting…” message. Typical conversion time: 2–10 seconds depending on length and complexity.
Step E6 — HTML Lands in Your Post
Once conversion completes:
- In Gutenberg: the HTML appears as new blocks (paragraphs, headings, tables, images, code blocks) inserted at your cursor position or appended to the bottom of the post.
- In Classic Editor / TinyMCE: the HTML is inserted into the visual editor, fully rendered.
Step E7 — Preview & Refine
- Click Preview (top-right of WordPress) to see how the post looks on your live theme.
- Make any final adjustments directly in the WordPress editor.
Step E8 — Publish or Save Draft
When ready, click Publish (or Save Draft to come back later).
8. Part F — Method 2: Upload a PDF
Use this when you have a research paper, eBook chapter, or any PDF whose content you want to publish as a blog post.
Step F1 — Open the PDF Tab
In the Any2HTML meta box, click the PDF tab.
Step F2 — Choose the File
You have two options:
- Drag & drop: Drag the PDF from your file manager directly onto the upload zone.
- Click to browse: Click the Choose File button → select the PDF → click Open.
Supported file size: Typically up to 25 MB. Larger files may need to be split first.
Step F3 — Confirm File Selection
The filename will appear under the upload zone (e.g., research-paper.pdf — 2.3 MB).
Step F4 — Click “Convert to HTML”
The plugin uploads the PDF to BibCit’s servers. Behind the scenes:
- Each page is parsed for text, equations, tables, and images.
- Math equations are converted to MathML / KaTeX.
- Tables retain their structure (rows, columns, merged cells).
- Embedded images are extracted and re-uploaded to your WordPress media library.
Conversion time: roughly 2–5 seconds per page.
Step F5 — Review Inserted Content
The HTML output appears in your editor. Scroll through and verify:
- Page breaks are gone (PDFs become continuous content).
- Equations render correctly.
- Images appear inline.
- Tables are formatted.
Step F6 — Save & Publish
Same as Markdown method — preview, then publish.
9. Part G — Method 3: Upload an Image (OCR)
For photos of whiteboards, scanned handwritten notes, screenshots of equations, or any image with text/symbols.
Step G1 — Open the Image Tab
Click the Image tab in the Any2HTML meta box.
Step G2 — Upload the Image
- Drag & drop, or click to browse.
- Supported formats: JPG, JPEG, PNG, WebP, GIF.
- Max size: usually 10 MB per image.
Step G3 — Click “Convert to HTML”
The image is sent to BibCit’s STEM-compatible OCR engine, which can recognize:
- Standard typed text in 50+ languages.
- Handwritten text (printed or cursive).
- Math equations (algebra, calculus, set theory).
- Chemistry equations and molecular structures.
- Tables, including hand-drawn tables.
- Code blocks and indentation.
Step G4 — Verify the Extraction
OCR is excellent but not 100% perfect, especially with messy handwriting. Skim the inserted HTML and:
- Fix any misread characters (e.g.,
0 vs O, l vs 1).
- Verify equations rendered correctly.
- Add formatting where the OCR was conservative.
Step G5 — Publish
Once content looks right, hit Publish.
10. Part H — Combining Multiple Sources Into One Post
This is one of the plugin’s most powerful workflows: build a single article from multiple AI tools, notes apps, PDFs, and images without ever stitching anything manually.
The key insight: Every time you click Convert to HTML, the new content is automatically appended to the same blog post, right after whatever was already there. You don’t merge HTML files. You don’t copy-paste between drafts. You don’t manage fragments. Just keep feeding sources into the meta box one after another — they all become part of the same post automatically, with full formatting preserved every time.
You can even paste multiple Markdown blocks from different AI tools into the same Markdown textarea before clicking Convert — they’ll all get processed together. Or convert one at a time and watch each new section flow seamlessly into the post. Either way works.
Example Scenario
You’re writing a blog post titled “How AI Tools Compare on Solving Math Problems”. You want to include:
- ChatGPT’s answer to a problem (Markdown captured via BibCit Markdown Capturer).
- Claude’s answer (Markdown).
- A scanned page from a textbook (Image OCR).
- A reference PDF page (PDF upload).
Step H1 — Insert First Source
- Use Method 1 (Markdown) — paste ChatGPT’s reply (captured via the BibCit Markdown Capturer extension — see Part E pro tip).
- Click Convert to HTML. Content appears in the editor.
Step H2 — (Optional) Add a Heading
In the WordPress editor, type a ## Claude's Answer heading or a divider so each source is visually separated. (This is optional — the plugin will append regardless.)
Step H3 — Insert Second Source
- Click back into the Any2HTML meta box.
- Stay on the Markdown tab.
- Clear the textarea (select all, delete).
- Paste Claude’s response.
- Click Convert to HTML.
The new HTML is automatically appended below your existing content — no stitching, no merging, no copy-paste between fragments.
Step H4 — Insert Third Source (Image)
- Switch to the Image tab.
- Upload the textbook scan.
- Click Convert to HTML.
The OCR’d content from the image appears right below the previous Claude section.
Step H5 — Insert Fourth Source (PDF)
- Switch to the PDF tab.
- Upload the reference PDF.
- Click Convert to HTML.
The PDF’s extracted content appears at the bottom of the running post.
Step H6 — Final Polish
You now have one cohesive post built from four very different sources, all assembled inside the same blog post automatically. Tidy up:
- Add an intro paragraph at the top.
- Add transition sentences between sections if needed.
- Add captions to any extracted images.
- Rearrange blocks in Gutenberg if you want a different order.
Step H7 — Publish
Done — a multi-source article assembled in minutes instead of hours, with zero manual stitching.
Bonus tip: You can also paste multiple Markdown chunks from different sources directly into the same textarea (separated by blank lines) and click Convert once. They’ll all be processed in a single API call and inserted as one continuous block of HTML.
11. Part I — What Formatting is Preserved
Bibcit Any2HTML is built on the BibCit MassiveMark engine, which preserves complex formatting that simple Markdown converters miss.
Text Formatting
- Bold, italic, bold-italic
StrikethroughInline code- Subscript, Superscript
- Highlighted/marked text
- Emojis 🎉 ✅ 📚
Headings
H1 through H6, with proper semantic tags.
Lists
- Bulleted lists
- Numbered lists
- Multi-level nested lists
- Task lists / checkboxes (
[ ] / [x])
Tables
- Standard tables
- Tables with merged cells (rowspan/colspan)
- Nested tables (a table inside a cell of another table)
- Aligned columns (left, center, right)
- Tables with code or math inside cells
Code Blocks
- Fenced code blocks with language hints (
```python, ```javascript)
- Syntax highlighting in supported themes
- Inline code with backticks
- Preservation of indentation and whitespace
Math (STEM)
- Inline equations:
$E = mc^2$
- Display equations:
$$\int_0^\infty e^{-x^2}\,dx = \frac{\sqrt{\pi}}{2}$$
- LaTeX commands: matrices, fractions, summations, integrals, limits, Greek letters.
- MathML output for accessibility.
Chemistry
- Chemical formulas: H₂O, CO₂, C₆H₁₂O₆
- Reactions and arrows:
2H₂ + O₂ → 2H₂O
- Subscripts and superscripts in molecular notation.
- Reaction conditions above arrows.
Media & Links
- Inline links
[text](url) and reference-style links.
- Images with alt text (extracted from PDFs/images go to your media library).
- Embed-ready URLs (YouTube, Twitter/X, etc., via WordPress oEmbed).
Quotes & Citations
- Block quotes (
>)
- Nested block quotes
- Inline citations
- Footnotes (where Markdown supports them)
Other
- Horizontal rules (
---)
- Definition lists
- Abbreviations
- HTML pass-through (raw HTML inside Markdown is preserved)
12. Part J — Toggling the Converter On/Off
Sometimes you want to write a post without the meta box getting in the way (e.g., a quick announcement post).
To Hide the Meta Box Temporarily
- Go to Settings → Any2HTML.
- Toggle Enable Markdown Converter to OFF.
- Save.
The meta box vanishes from your post editor until you re-enable it.
To Hide Per-User (Gutenberg only)
- In the post editor, click the three-dot menu (top right).
- Click Preferences → Panels.
- Uncheck Bibcit Any2HTML.
This hides it just for your user account, not site-wide.
13. Part K — Troubleshooting
“Invalid API Key” Error
- Re-copy the key from your BibCit dashboard (no extra spaces).
- Generate a new key if the old one was revoked.
- Make sure your BibCit account email is verified.
“Conversion Failed” or Timeout
- Check your internet — the plugin needs to reach
api.bibcit.com.
- Reduce file size — split large PDFs into smaller chunks.
- Try again — occasional transient errors resolve on retry.
- Check credits — view your balance in the BibCit dashboard. If you’re out, top up.
Meta Box Not Appearing
- Confirm the plugin is Active under Plugins → Installed Plugins.
- In Gutenberg, check Preferences → Panels for the toggle.
- Disable and re-enable the plugin.
- Clear your browser cache.
Tables/Equations Not Rendering Correctly
- Make sure your theme loads KaTeX or MathJax. Many modern WordPress themes do; if not, install a math plugin or paste the loader into your theme’s header.
- For complex tables, try the PDF method instead of pasting raw Markdown — it preserves more structure.
OCR Misreading Handwritten Text
- Take a clearer photo (good lighting, no shadows, straight angle).
- Crop tightly around the text.
- For very poor handwriting, expect to do a quick manual review after conversion.
Plugin Conflicts
- If a feature breaks after another plugin update, deactivate plugins one at a time to find the culprit. Most commonly: aggressive caching plugins or other Markdown plugins.
14. Part L — Tips, Best Practices & Pro Workflows
Workflow 1: AI-Assisted Drafting
- Ask ChatGPT/Claude/Gemini to draft your post in Markdown.
- Copy the response — for ChatGPT/Gemini, use the BibCit Markdown Capturer extension’s “Bibcit Copy” button (the default copy button strips formatting). For Claude, the native copy button works fine.
- Paste into Any2HTML’s Markdown tab → Convert.
- Edit for voice and accuracy in the WordPress editor.
- Publish.
Time saved: A 2,000-word post that took 90 minutes to format manually now takes 15 minutes start-to-finish.
Workflow 2: Notion → WordPress
- In Notion, click
••• on the page → Export → Markdown & CSV.
- Open the exported
.md file → copy contents.
- Paste into Any2HTML → Convert.
Workflow 3: Obsidian Vault → Blog
- Open your Obsidian note.
Ctrl+A (or Cmd+A) → Copy.- Paste into Any2HTML → Convert.
Obsidian’s wiki-links ([[Page]]) won’t resolve — replace them with proper Markdown links ([Text](URL)) before pasting.
Workflow 4: Old PDF Archives
If you have years of PDF research notes you want to publish as a blog series:
- Open one PDF in Any2HTML’s PDF tab.
- Convert.
- Edit lightly, add intro/outro.
- Schedule the post.
- Repeat — you can build months of content in a weekend.
Workflow 5: Handwritten Lecture Notes → Searchable Blog
- Snap a phone photo of each handwritten page.
- Upload one image at a time via the Image tab.
- Click Convert to HTML after each upload — every conversion is automatically appended to the same post, one section after another, with all formatting fully rendered. No manual stitching required.
- Add headings or transitions between sections in the WordPress editor if you want visual separation.
- Now your handwritten notes are searchable, indexable, and shareable.
General Best Practices
- Always preview before publishing — automated conversion is excellent but not infallible.
- Save drafts often —
Ctrl+S / Cmd+S is your friend.
- Use descriptive headings — they help SEO and reader navigation.
- Don’t paste private/confidential text unless you’ve reviewed BibCit’s privacy policy. Conversion happens on their servers.
- Keep your API key secret — anyone with it can use your credits. Regenerate immediately if leaked.
15. Support
If you run into anything this guide doesn’t cover, the BibCit team is responsive:
Related BibCit Tools You Might Like
Quick Reference — One-Page Cheat Sheet
| Task |
Action |
| Sign up |
bibcit.com → Sign Up → Dashboard → Payments tab → Verify Email → click email link → 5 free credits added |
| Get API key |
Dashboard → click profile icon (top-right) → My Profile → modal opens → scroll to “API Key:” → click Generate API Key → copy immediately (shown only once) |
| Capture Markdown from ChatGPT/Gemini |
Install BibCit Markdown Capturer → https://www.bibcit.com/en/mcapturer → use the “Bibcit Copy” button on each response |
| Install plugin |
WP Admin → Plugins → Add New → Search “Bibcit Any2HTML” → Install → Activate |
| Configure |
Settings → Any2HTML → Paste API key → Save |
| Use Markdown |
Post editor → Any2HTML meta box → Markdown tab → Paste → Convert to HTML |
| Use PDF |
Any2HTML meta box → PDF tab → Upload → Convert to HTML |
| Use Image |
Any2HTML meta box → Image tab → Upload → Convert to HTML |
| Combine sources |
Repeat any of the above; each conversion auto-appends — no stitching needed |
| Disable temporarily |
Settings → Any2HTML → Toggle off |
| Get help |
Live Chat: https://direct.lc.chat/9254115/11 / Discord / bibcithelp@gmail.com |
Document version 1.0 — prepared as a tutorial reference for the Bibcit Any2HTML video walkthrough.